Understanding how to properly use the FCLGA1151 socket is essential for building or upgrading your PC. In this comprehensive guide, we will walk you through everything about how to use FCLGA1151, from installation to troubleshooting, ensuring a smooth and successful experience.
Understanding FCLGA1151 Socket
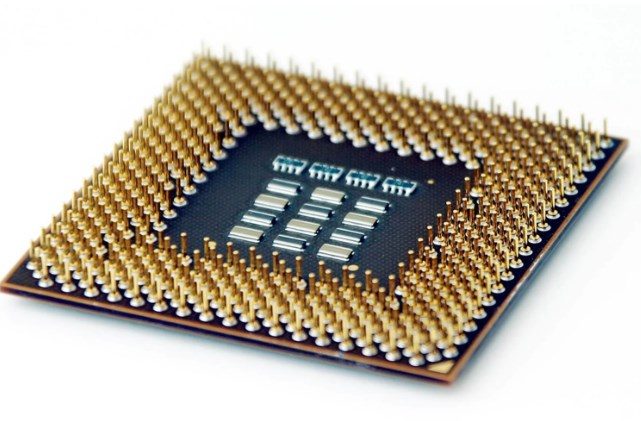
The FCLGA1151 socket is a type of CPU socket used for Intel processors. FCLGA stands for Flip-Chip Land Grid Array, which refers to the method of connecting the processor to the motherboard. The number 1151 indicates the total number of pins on the socket.
Unlike older sockets, the FCLGA1151 socket has pins on the motherboard instead of on the processor. This means that the processor is flipped and placed upside down onto the socket, allowing for better thermal performance and more compact designs.
The FCLGA1151 socket supports both 6th and 7th generation Intel Core processors, including Skylake and Kaby Lake architectures. It provides compatibility with various chipsets, enabling different features and capabilities depending on the specific chipset used.
Compatible Processors and Chipsets With FCLGA1151 Socket
The FCLGA1151 socket is compatible with a range of Intel processors. Some of the compatible processors include:
- 6th Generation Intel Core i3, i5, and i7 processors (Skylake architecture)
- 7th Generation Intel Core i3, i5, and i7 processors (Kaby Lake architecture)
When it comes to chipsets, the FCLGA1151 socket supports several options, including:
- Intel H110 chipset
- Intel B150 chipset
- Intel H170 chipset
- Intel Q170 chipset
- Intel Z170 chipset
It’s important to note that not all chipsets are compatible with both 6th and 7th generation processors, so it’s essential to ensure compatibility between the processor and chipset when choosing components for your system.
How to Use FCLGA1151
1. Preparing for Installation
Before diving into the installation process, it’s crucial to gather all the necessary tools and components. Ensure that you have a compatible FCLGA1151 motherboard, an Intel processor compatible with the socket, thermal paste, a CPU cooler, and the required power and data cables.
2. Installing the FCLGA1151 Processor
To begin the installation, carefully remove the protective cover on the FCLGA1151 socket of your motherboard. Align the notches on the processor with the socket, ensuring a perfect fit. Gently place the processor onto the socket and apply even pressure to secure it in place. Avoid applying excessive force, as it may damage the delicate pins.
3. Applying Thermal Paste and Installing the Cooler
To prevent overheating and ensure optimal performance, applying thermal paste and installing a CPU cooler is crucial. Apply a small amount of thermal paste onto the center of the processor. Spread it evenly using a plastic card or applicator. Once done, carefully attach the CPU cooler, aligning it with the mounting holes on the motherboard. Secure it in place according to the manufacturer’s instructions.
4. Connecting Power and Data Cables
With the processor and cooler in place, it’s time to connect the necessary power and data cables. Connect the main power cable from the power supply unit to the motherboard, ensuring a secure connection. Additionally, connect any required data cables, such as SATA cables for storage devices or PCIe cables for graphics cards.
5. BIOS Configuration
After completing the physical installation, it’s essential to configure the BIOS settings. Start by accessing the BIOS menu during system startup, usually by pressing a specific key (such as Del or F2) as indicated on the screen.
Within the BIOS, navigate to the CPU settings and ensure that the processor is recognized correctly. Adjust any necessary settings, such as enabling XMP for memory overclocking or adjusting fan curves for optimal cooling.
Also Read: All You Need To Know About FCLGA1151

Troubleshooting Common Issues with FCLGA1151
CPU not being recognized
If your CPU is not being recognized by the system, double-check the installation and ensure that the processor is seated correctly in the FCLGA1151 socket. Additionally, verify that the motherboard BIOS is up to date, as outdated BIOS versions may not support newer processors.
Overheating
Overheating can lead to system instability and potential damage to your components. Ensure that the CPU cooler is properly installed and making good contact with the processor. Clean any dust or debris from the cooler and ensure that the airflow within the case is adequate. Consider upgrading to a more efficient CPU cooler if necessary.
System instability and crashes
If your system experiences frequent crashes or instability after installing the FCLGA1151 processor, check the RAM compatibility with your motherboard. Incompatible or faulty RAM modules can cause such issues. Try reseating the RAM or testing with different modules to isolate the problem.
Blue screen errors
Blue screen errors, also known as BSODs, can be caused by various factors. Ensure that all drivers, including chipset and graphics drivers, are up to date. If the issue persists, consider running a memory diagnostic tool to check for any potential issues with your RAM.
Incorrectly detected CPU frequency
If the CPU frequency is incorrectly detected in the BIOS or operating system, it may indicate an issue with the motherboard’s BIOS version. Check for any available BIOS updates from the manufacturer’s website and follow their instructions to update the BIOS.
BIOS update problems
When updating the BIOS, ensure that you are using the correct BIOS version for your specific motherboard model. Follow the manufacturer’s instructions carefully and avoid interrupting the update process. If you encounter any issues or errors during the update, consult the motherboard’s manual or contact the manufacturer for further assistance.
Conclusion
Mastering the use of the FCLGA1151 socket is crucial. By following the steps outlined in this guide, you can confidently install your processor onto a compatible motherboard and unleash the full potential of your system. Remember to handle the delicate components with care, ensure proper alignment during installation, and consult your specific processor and motherboard manuals for any additional instructions.