The ATMEGA328P microcontroller is a versatile and powerful device widely used in various electronic projects. With its rich set of features and capabilities, it has become a popular choice among hobbyists and professionals alike. In this blog, we will explore the key features and advantages of the ATMEGA328P, as well as provide a comprehensive guide on how to use it effectively.
What is an ATMEGA328P microcontroller?
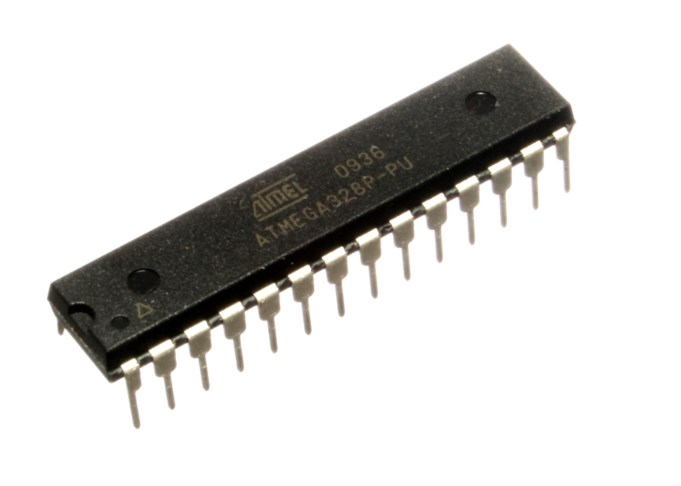
The ATMEGA328P is a microcontroller from the AVR family, developed by Microchip Technology (formerly Atmel Corporation). It is a popular and widely used microcontroller in the electronics industry.
What type of memory is ATMEGA328P?
The ATMEGA328P has different types of memory, including:
- Flash Memory: It is used to store the program code and can be reprogrammed.
- SRAM (Static Random Access Memory): It is used for storing variables and data during runtime.
- EEPROM (Electrically Erasable Programmable Read-Only Memory): It is non-volatile memory used for storing small amounts of data that need to be retained even when power is turned off.
What is ATMEGA328P used for?
The ATMEGA328P is commonly used in various applications such as:
- Embedded Systems: It is often used as the main controller in embedded systems due to its compact size and versatile features.
- Arduino Development Boards: The ATMEGA328P is the microcontroller at the heart of several Arduino boards, making it a popular choice among hobbyists and makers.
- IoT Devices: Its low-power consumption and wide range of peripherals make it suitable for Internet of Things (IoT) applications.
- Robotics: The ATMEGA328P can be found in many robotic projects, controlling motors, sensors, and other components.
Advantages of ATMEGA328P
- Versatile and flexible microcontroller with a wide range of applications.
- Affordable and readily available in the market.
- Strong community support with extensive documentation and libraries.
- Low power consumption for energy-efficient designs.
- Robust and reliable performance.
- Compatibility with Arduino development boards and shields.
Specs
|
Type
|
Description
|
|---|---|
|
Category
|
Integrated Circuits (ICs)
Embedded
Microcontrollers
|
|
Mfr
|
Microchip Technology
|
|
Series
|
AVR® ATmega
|
|
Package
|
Tube
|
|
Product Status
|
Active
|
|
DigiKey Programmable
|
Verified
|
|
Core Processor
|
AVR
|
|
Core Size
|
8-Bit
|
|
Speed
|
20MHz
|
|
Connectivity
|
I²C, SPI, UART/USART
|
|
Peripherals
|
Brown-out Detect/Reset, POR, PWM, WDT
|
|
Number of I/O
|
23
|
|
Program Memory Size
|
32KB (16K x 16)
|
|
Program Memory Type
|
FLASH
|
|
EEPROM Size
|
1K x 8
|
|
RAM Size
|
2K x 8
|
|
Voltage – Supply (Vcc/Vdd)
|
1.8V ~ 5.5V
|
|
Data Converters
|
A/D 6x10b
|
|
Oscillator Type
|
Internal
|
|
Operating Temperature
|
-40°C ~ 85°C (TA)
|
|
Mounting Type
|
Through Hole
|
|
Package / Case
|
28-DIP (0.300″, 7.62mm)
|
|
Supplier Device Package
|
28-PDIP
|
|
Base Product Number
|
ATMEGA328
|
Features
- 32KB of Flash memory for program storage.
- 2KB of SRAM for variable and data storage during runtime.
- 1KB of EEPROM for non-volatile data storage.
- 23 General-Purpose Input/Output (GPIO) pins for interfacing with external components.
- 6 Pulse Width Modulation (PWM) channels for controlling analog outputs.
- 10-bit Analog-to-Digital Converter (ADC) with multiple input channels.
- Multiple communication interfaces including UART, I2C, and SPI.
- Built-in timers and interrupts for precise timing and event-driven programming.
- Low-power sleep modes for energy-efficient operation.
- Wide operating voltage range of 1.8V to 5.5V.
- In-system programmable through ICSP (In-Circuit Serial Programming) interface.
- Fuse bits for configuring various settings such as clock source and boot loader options.
Pin Out

Datasheet
Download the document here now!
Atmega328 vs Atmega328p
The ATmega328 and ATmega328P are two closely related microcontrollers from the same AVR family. While they share many similarities, there are a few key differences between them.
The ATmega328P is an enhanced version of the ATmega328, with the following improvements:
- Power Consumption: The ATmega328P consumes less power compared to the ATmega328, making it more suitable for battery-powered applications and low-power designs.
- Brownout Detection: The ATmega328P includes a brownout detection feature that can reset the microcontroller when the supply voltage drops below a certain threshold. This helps in maintaining stability during voltage fluctuations.
- Packaging Options: The ATmega328P is available in more package options compared to the ATmega328. It offers both PDIP (Plastic Dual Inline Package) and QFN (Quad Flat No-leads) packages, providing greater flexibility for different application requirements.
Apart from these differences, both microcontrollers have similar features and pinouts, making them compatible with most Arduino boards and libraries.
Getting Started With the ATMega328P
Setting up the Development Environment
To start working with the ATMega328P, you will need to set up the development environment. Here’s what you’ll need:
1. Hardware:
- ATMega328P microcontroller board (e.g., Arduino Uno)
- USB cable for connecting the board to your computer
- Breadboard and jumper wires (optional)
2. Software:
- Arduino IDE: Download and install the Arduino Integrated Development Environment (IDE) from the official Arduino website.
Once you have the necessary hardware and software, you can proceed with the following steps.
Exploring Documentation and Resources
Before diving into coding, it’s crucial to familiarize yourself with the ATMega328P’s documentation and available resources. The official ATMega328P datasheet, along with the Arduino reference documentation, provides detailed information about the microcontroller’s pinout, registers, and programming instructions. Additionally, online forums, tutorials, and communities like the Arduino forum and Stack Exchange can be valuable sources of information and support.
Starting a New Project
To start a new project with the ATMega328P, follow these steps:
- Launch the Arduino IDE.
- Select the appropriate board from the “Tools” menu (e.g., Arduino Uno).
- Connect the ATMega328P board to your computer using the USB cable.
- Open the “Blink” example sketch from the “File” menu, which will blink an LED connected to Pin 13.
- Modify the code or add new functions according to your project requirements.
- Verify the code for any errors by clicking on the checkmark icon.
- Upload the code to the ATMega328P board by clicking on the arrow icon.
Developing and Debugging Applications
The ATMega328P offers a wide range of features and capabilities that can be utilized in your applications. You can use the built-in GPIO pins, ADC, PWM, UART, I2C, and SPI interfaces to interface with sensors, displays, actuators, and other external components.
The Arduino IDE provides an intuitive and beginner-friendly environment for writing, testing, and debugging your code. You can monitor the serial output, use breakpoints, and leverage the extensive library ecosystem to simplify development.
Building and Flashing Applications
Once you have developed your application, it’s time to build and flash it onto the ATMega328P microcontroller. The Arduino IDE simplifies this process with a single click. It compiles your code into a binary file and uploads it to the microcontroller via the USB connection.
The bootloader on the ATMega328P allows you to program it without requiring an external programmer. However, if you prefer using other tools like AVRDUDE or Atmel Studio, you can do so by selecting the appropriate options in the Arduino IDE.
Testing and Deploying the Final Application
After flashing the application onto the ATMega328P, it’s crucial to thoroughly test it to ensure it functions as expected. Use appropriate debugging techniques, such as printing debug messages to the serial monitor or using LEDs to indicate specific states. Once you are satisfied with the performance and functionality, you can deploy the final application in your target system or integrate it into your project.

FAQs
Is ATmega328P good?
Yes, the ATmega328P is considered a reliable and capable microcontroller. Its widespread use, strong community support, and availability of resources make it a popular choice among hobbyists, students, and professionals. It offers a good balance of features, cost-effectiveness, and ease of use, making it suitable for a wide range of applications.
How powerful is ATmega328P?
The ATmega328P is a relatively powerful microcontroller considering its size and price. It operates at a clock frequency of up to 20 MHz and has 32KB of flash memory for program storage. It also provides 2KB of SRAM for variable and data storage, along with several built-in peripherals such as ADC, PWM, UART, I2C, and SPI interfaces. These features enable the ATmega328P to handle various tasks and interface with external components effectively.
What is the meaning of 328 in ATmega328?
The number “328” in ATmega328 represents the memory size of the microcontroller. It has 32KB of flash memory, which is used for storing the program code and can be reprogrammed multiple times.
Is ATMEGA328P discontinued?
No, as of now, the ATMEGA328P is not discontinued. It continues to be widely available in the market and is a popular choice for many applications. However, it’s always advisable to check with the manufacturer or authorized distributors for the latest information on product availability and updates.
Conclusion
In conclusion, the ATMEGA328P microcontroller is a reliable and flexible solution for a wide range of applications. Its impressive features, performance, and ease of use make it a favorite among electronics enthusiasts. By following the provided guide, beginners can quickly get started with the ATMEGA328P and unlock its full potential. Whether you are a hobbyist or a professional, the ATMEGA328P is sure to enhance your electronic projects and bring your ideas to life.